Top 5 Tips on How to Water Plants While Away
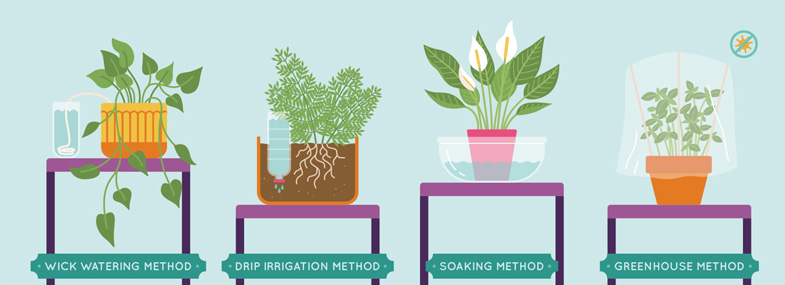
So how do you water plants while away? As plant lovers, we are all too familiar with the anxiety of figuring out how to keep our plants watered while we are away. In the middle of finalising our travel itineraries, sorting out last-minute work issues, and making departure arrangements, we also often find ourselves worriedly scrolling through our phone books trying to organise a roster of family and friends to plant-sit for us.
But, as time-honoured a tradition as plant-sitting may be, it is not always the most effective. Subject to people’s unpredictable schedules and memories, it can often result in you returning home to parched and wilting plants.
Apart from growing your plants permanently in water, which you can read all about here, there are actually several easy and surefire ways to make sure that your plant babies get all the water they need while you’re away. And the best thing is that they are all super budget-friendly! So, let’s dive into the top five methods right now.
1. The Wick Watering Method
With a history that can be traced back to the 1800s, the wicking method is an effective and reliable way of creating self-watering plants. It gets its name from the traditional use of a candlewick rope to draw water from a container and into the plant’s soil. However, you can also use a cotton string, shoelace, or any other long material as long as it’s absorbent. Some people even use thick paper towels. But a cotton rope is the best option.
Size
The size of the water container depends on how long you will be away. If it’s only one week, an ordinary single glass of water, or perhaps even a small jug, will probably suffice. But if longer, you may want to use a vase or a 1-gallon jug, or a bucket. Additionally, also take into consideration that plastic plant pots retain water longer than unglazed clay pots.
Last step
Next, fill the container with water and place one end of the cotton rope inside. To prevent the rope from slipping out, make sure that it rests at the very bottom of the container of water and create one or two coils on top of each other for good measure. As for the other end of the rope, push it about 2 to 3 inches into the soil of the potted plant. You can use your finger or a pencil, but make sure that you don’t disturb the plant’s roots.
2. The Drip Irrigation Method
Not only will you be keeping your plants well-watered with this technique, but you will also be recycling your used plastic or glass bottles! A win for nature all around.
To keep your plants watered for longer, use a large bottle. But if the size of the plant pot won’t allow that,then two smaller bottles will work just as well. Just make sure that you wash all of the bottles first, inside and outside. There are two types of drip self-watering methods: slow release and fast release.
The Slow-release Drip
To create a slow-release system, you can use either a plastic or wine bottle. The only thing to make sure of is that the bottle has a screw cap. Remove the bottle cap and, using a skewer or a hammer and nail, poke 4 to 5 holes in it. The more the holes, the water faster the water will drain from the bottle. If the cap on the wine bottle has a plastic pourer, remove it using pliers. When finished, screw the cap back on the bottle.
Next, if using a plastic bottle, cut off the bottom of the bottle with a knife or scissors. Not a whole lot, just an inch or so to maintain sufficient internal volume. Then, dig a hole in the soil large enough to insert about half of the bottle and place the bottle inside upside down. Replace the soil around the bottle, fill the bottle with water, and your slow-release drip system is ready to do its thing.
In the case of the wine bottle, do not cut off the bottom but rather simply fill it up with water and place it upside down in the hole. Then, replace the soil and you’re good to go.
The Fast-release Drip
If you have particularly thirsty plants, the fast-release water technique is the way to go. Pierce 6 holes on the side of a clean, suitably-sized plastic bottle. Keep the holes on the same side of the bottle and, because the bottle will be placed upright in the soil, position the holes on the bottom half or two-thirds of the bottle.
Then, puncture 3 holes on the bottom of the bottle. This is to keep the water flowing and prevent it from becoming stagnant at the bottom. Insert two-thirds of the bottle into the soil and turn the holes on the side of the bottle to face the plant. Replace the soil around the bottle, fill it with water, and screw the bottle cap back on the bottle and you’re done.
Some plant parents prefer to water the plant first before inserting the bottle into the soil to reduce the amount of water that the plant will need to draw from the bottle. But if you know that you’ll be away for an extended period of time, you can use the slow release method and also add several bottles. The great thing about both drip methods too is that they can also be applied to outdoor plants.
3. The Soaking Method
Commonly known as the bathing method, one of the easiest ways to create a self-watering plant is by placing it in water. Plants can also be watered from the bottom up and this method satisfactorily meets most plants’ watering needs for quite some time.
Depending on the size of the plant and the length of time you will be away, you can either use a bathtub, sink, basin, or a deep bowl to hold the water. But for trips of about a week or less, simply placing your plant in a saucer filled with water will suffice. Do make sure that the saucer is bigger or the same size as the plant pot so that the bottom of the pot rests on the saucer, thus enabling it to soak up the water.
If using a larger water vessel, fill it with several inches of water and place the plant pot inside. As long as the pot has good drainage, the plant’s roots will have access to the water and happily drink it up. There’s no need to remove the plant from its pot.
One thing to take into consideration with this method is the plant’s light requirements. Unless your bathroom has a big window that lets in lots of light, it is not advisable to put a plant in there that needs plenty of sun as this will adversely affect its growth. Instead, you may want to use a portable vessel, such as a basin or bowl, so that you can later place the plant in a suitably sunny area.
4. The Greenhouse Method
Rather than providing the plant with water, this method involves locking in the moisture that evaporates from the plant. The trapped water droplets then fall back onto the soil and keep the plant watered. It’s great for plants that don’t need lots of water every day.
You can choose to create a mini greenhouse or a terrarium – they both have the same self-watering effect on plants. Check out this in-depth guide to learn more about how quick and easy it is to build your own terrarium.
If you prefer to create a mini greenhouse, all you will need is a clear plastic bag and four sticks that are long enough to hold up the four corners of the bag. This is because the moisture on the plastic bag will turn the plant’s leaves brown and eventually cause it to rot if in contact for an extended period of time. You can use wooden skewers, chopsticks, or just your regular ol’ sticks from the garden.
Insert the sticks into the plant’s soil and cover the plant with the plastic bag. Take care not to place the plant in direct sunlight with this method because it makes the temperature inside the bag rise over time and the additional heat from the sun will cause the plant to overheat and possibly die.
5. Call A Friend
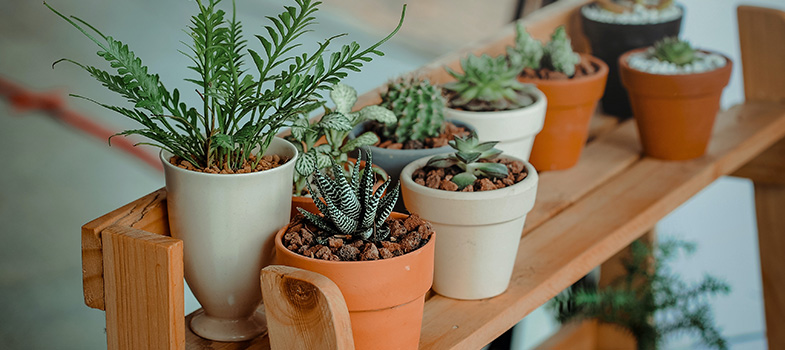
Not all plants are suited for self-watering. Plants that have thick or waxy leaves or fewer leaves, such as succulents, gerberas, orchids, and bearded iris are sensitive to overwatering. They require their soil to first become dry before being watered again. Check out this article to learn more about different plants that thrive in dry conditions.
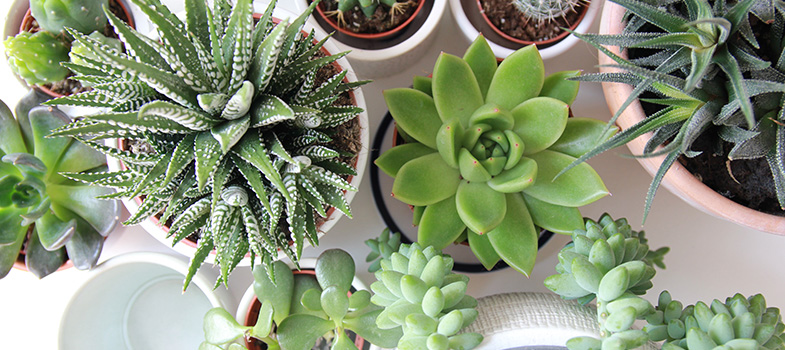
With these kinds of plants, you may simply want to ask a friend, relative, or neighbour to come by and water them for you. Even with self-watering systems, it won’t hurt to have someone occasionally dropping in to check how the plants are faring. The advantage though with self-watering plants is that it won’t have to be a daily occurrence.
You can make the process easier for your plant sitter by writing down watering instructions for each plant, or maybe even attaching a note to each plant, to help guide them.
Final thoughts
Self-watering systems are incredibly simple to set up and are a great way to ensure that plant lovers have one less thing to worry about when travelling. Plants that do best with self-watering are those that thrive in wet soil, including ferns, pothos, peace lilies, hydrangeas, and most herbs.
You can also experiment with using mulch on its own or together with one of the self-watering methods to slow down the amount of water that your plants lose due to evaporation.
However, if you find that you don’t want to worry about frequent watering, look into buying succulents and cacti. Flowers Across Melbourne has a lovely selection of succulents for you to choose from and, with their same-day delivery, you could start your indoor succulent garden today.
Visit Flowers Across Melbourne to check out more gorgeous plants for all occasions and price ranges.

Comments are closed.